How to Properly Prepare Wooden Parts for Painting for a Long-Lasting Result

Preparing wooden surfaces for finishing is not just an extra stage in the production process; it is the foundation of the durability and aesthetics of any product. Whether it is a furniture front, a complex architectural part or a floor covering, the quality and service life of the paint and varnish coating depend 90% on how thoroughly and skilfully the preliminary work was carried out.
At our company, which specialises in high-precision woodworking and the production of joinery, we often encounter the misconception that expensive, high-quality paint on its own guarantees an excellent result. However, even the most expensive material cannot conceal defects left at the preparation stage, nor compensate for a breach of the technological process. Proper preparation is a comprehensive approach that demands attention to detail, an understanding of the properties of wood and strict adherence to the sequence of operations. It is precisely this that our detailed article is devoted to, in which we reveal the professional secrets of a durable finish.
🌡️ Wood Moisture Control: A Critical Factor of Stability
Moisture control is arguably the most critically important stage, one that precedes any machining and, all the more, preparation for painting. Wood is a hygroscopic material that is constantly exchanging moisture with its surroundings. This property, called equilibrium moisture content, has a direct and immediate effect on the stability of the future part and the quality of adhesion to the coating.
If a wooden blank is painted at a moisture content significantly exceeding the in-service norm, a number of serious problems will inevitably arise. After the coating is applied, once the process of natural drying and shrinkage begins, the wood will seek to release the excess moisture. This moisture, trapped beneath the layer of paint, will look for a way out, leading to internal stress, the formation of microcracks and, in the worst case, to peeling and flaking of the finish coat.
For each type of product there is its own optimal moisture value. For example, for interior joinery (furniture, doors) this figure is usually in the range of 8% to 12%. For exterior structures (facades, decking boards) the permissible values may be higher, but they must always be standardised. In our practice we use high-precision electronic moisture meters calibrated to the wood species in order to obtain precise, rather than approximate, data.
We always emphasise that buying already-dried material does not remove the responsibility for a repeat check. Storage of even a few days in unsuitable conditions (for example, in a cold or damp warehouse) can lead to an uneven uptake of moisture. That is precisely why measurements are taken not only when the material is received into the warehouse, but also immediately before the preparation stage begins.
An uneven distribution of moisture within a part is another hidden threat. The outer part may show an acceptable 10%, while the core may contain 15% or more. During machining (planing, milling) this can cause internal stress that will show up later, after painting, in the form of a warped part or “twisting” of the grain.
If the moisture content of a part exceeds the established norms, we do not allow it into further work. The part is sent to a chamber for controlled conditioning drying. This is a slow but necessary process that allows the wood to gradually reach the required equilibrium state without internal cracking or deformation. Time saved on this step always turns into losses many times greater at the rework or warranty-repair stage.
Particular attention should be paid to glued joints. If parts are glued at differing moisture contents, the internal stress at the joint will be at its maximum. Subsequently this can lead to a visible split along the glue line, which no paint will conceal. Therefore, in the production of large glued items (worktops, panels) we strictly ensure that all lamellae have an almost identical moisture percentage.
In summary, moisture control is not a technical but a technological imperative. It is the first and most important guarantee that the finished product will retain its geometry and that the applied paint and varnish coating will not be destroyed from within. Only a stable material can ensure a stable and durable result.
🔍 Initial Inspection and Defect Removal: Hidden Threats
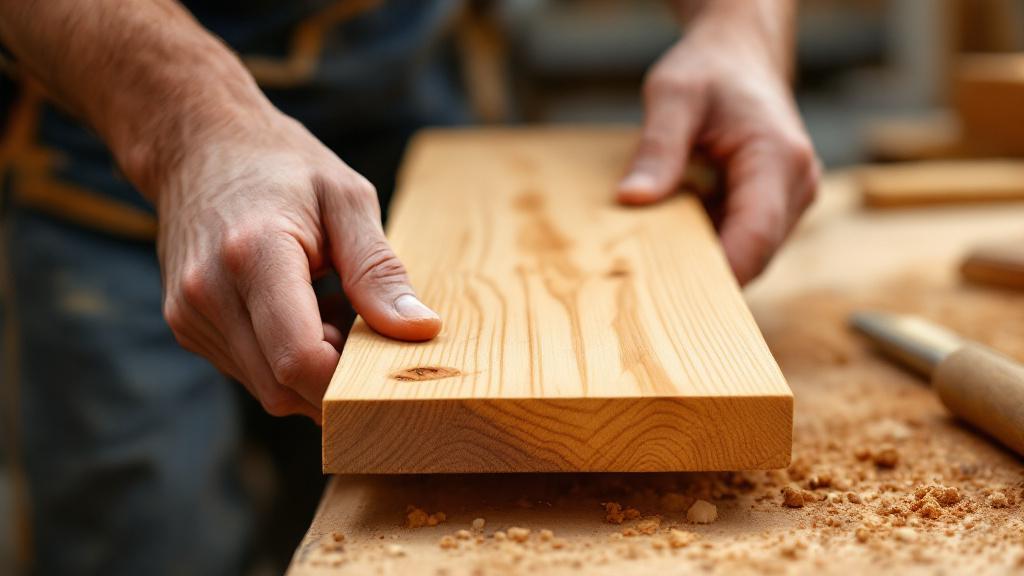
Once the material has passed moisture control and been deemed stable, the stage of thorough initial inspection begins. This process must be as meticulous as possible, since most minor defects that seem insignificant on “bare” wood become absolutely obvious and often catastrophic after a gloss, or even matt, finish coat is applied.
The key task of the initial inspection is to identify and localise all potentially problematic areas. These include resin pockets, traces of mould or blue stain, deep dents, chips, cracks, and defects arising during rough machining, such as grain “tear-out” or tool marks. Each of these defects requires its own specific method of removal before the part moves on to sanding.
Resin pockets, characteristic of conifers, are among the main enemies of a quality paint job. Resin, even after surface cleaning, tends to “sweat out” under the influence of temperature and time, especially when it is sealed beneath a layer of coating. This leads to discolouration, tackiness and a complete breakdown of adhesion in that spot. Our technology calls for the mandatory removal of resin — the pocket is opened, the resin is removed mechanically, and the cavity is thoroughly washed with solvent (for example, acetone) for complete degreasing. Only after this can the defect be filled with a specialised two-component filler or a plug of the same wood species.
Cracks, especially those running along the grain, must be stabilised. If a crack is small and shallow, it can be filled with a specialised repair adhesive or filler that matches the colour (for a clear finish) or simply has good adhesion and elasticity (for an opaque paint). More serious cracks affecting structural integrity may require reinforcement with wooden splines or complete replacement of the damaged section of the part.
Surface defects, such as impact dents or marks from improper transport, can often be corrected without filler. Natural wood has the ability to recover its shape when exposed to moisture and heat. We use the method of “steaming” or local wetting, where a damp cloth is placed on the dent and then a hot iron or special heat gun is applied. The wood fibres swell and rise, which significantly reduces the depth of the defect. After drying, the spot is treated with a finishing sanding.
Biological damage must not be ignored either. Traces of blue stain or the early stage of mould require not just scraping but also chemical treatment. Such areas are treated without fail with special antiseptic compounds for wood. If the damage is deep, the part may be deemed unsuitable for use in high-quality products, since its structural properties are already compromised and no paint can halt the development of the microorganisms.
The final stage of the initial inspection and repair is thorough cleaning. Any dust, adhesive residue, filler or solvent left on the surface will hinder the even penetration of primer or stain, creating stains and impairing adhesion. We use compressed air and clean, lint-free cloths to completely remove all foreign particles before moving on to machining.
Thus, the initial inspection is a process that requires not haste but precisely an expert eye. It is an investment of time that prevents the need for costly rework of the entire product after the finish coat has already been applied. Only a flawlessly repaired and stable part is ready for the next, equally important stage — sanding.
⚙️ Sanding: The Secrets of Perfect Adhesion and Smoothness
Sanding is, without exaggeration, the cornerstone of preparing a wooden surface for painting. It serves two fundamental purposes: firstly, to create a perfectly smooth and even surface by eliminating all traces of previous processing (planing, milling); and secondly, to create the necessary microstructure (a keyed surface) for optimal adhesion of the paint and varnish materials.
We always begin the sanding process with a careful selection of abrasive material. The choice of grit depends on the wood species, the type of surface being processed and, most importantly, on the required finish coat. For the initial, rough processing, removing deep defects and plane marks, we use a coarser grit, usually P80 or P100. It is important to note that the aim of this stage is to level, not simply to scratch the surface.
A key principle of professional sanding is a gradual transition between grit numbers. You cannot jump straight from P80 to P240, since the finer grit will not be able to fully remove the deep scratch pattern left by the coarse abrasive. This “forgotten” deep scratch will become clearly visible after applying varnish or dark paint, since the pigment or gloss will highlight it as microscopic grooves. The correct sequence is P80 (if needed), then P120, P150 or P180, and a final stage of P220 or P240.
The direction of sanding is critically important, especially for products that will be coated with clear varnish or stain. The main rule is to always sand strictly along the grain of the wood. Cross-grain sanding leaves visible scratches that become especially noticeable under raking light and cannot be fully removed by subsequent fine abrasives. In cases where cross-sanding is necessary (for example, when using orbital machines), one must be as careful as possible and finish the area with a light stroke along the grain.
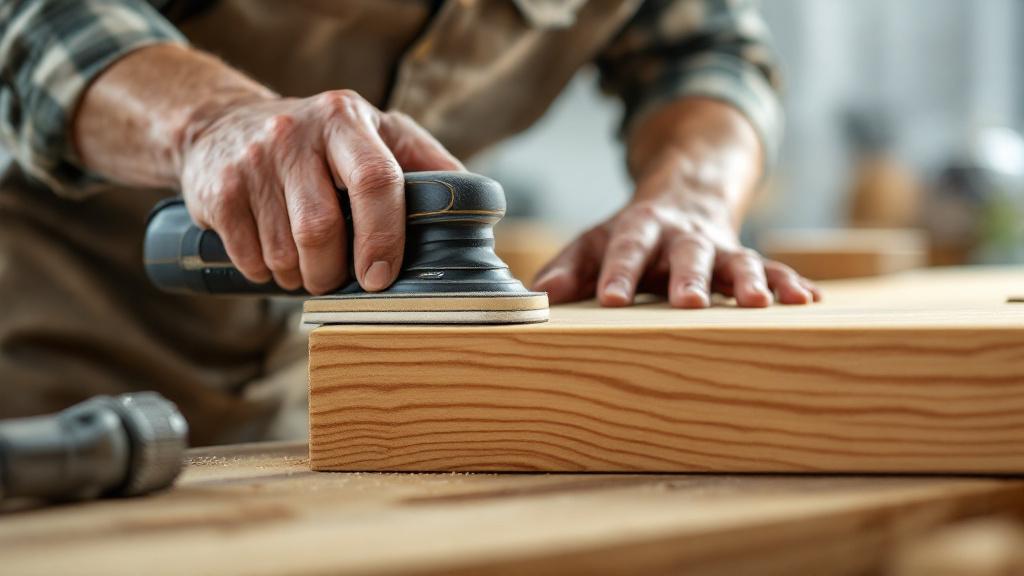
An important role is played by the choice of sanding tool. For flat surfaces we use surface or belt sanders. For curved, profiled or carved elements we use hand orbital machines with soft pads, as well as specialised flexible abrasives, sponges and hand sanding. Using the right tool ensures even pressure and prevents the abrasive from sinking into the soft areas of the wood.
One must bear in mind the so-called grain raising. After the final sanding the wood appears perfectly smooth. However, the first contact with moisture (a water-based primer, a stain) makes the microscopic wood fibres “stand on end”. If they are not removed, the surface will become rough after the first coat, and the adhesion of subsequent layers will deteriorate. To prevent this, we use the method of “intermediate wetting”: after the final sanding (for example, P180) the surface is lightly wiped with a damp sponge or sprayed with water, dried, and then the raised grain is knocked back with a very fine abrasive, P220 – P240.
The final grit (as a rule, P220–P240) is the standard for most modern paint and varnish systems. A finer grit (P320 and above) can “burnish” the surface to such an extent that it becomes too smooth. This significantly reduces mechanical adhesion, since the paint or varnish literally has nothing to “grip” onto at the molecular level. The ideal surface is not mirror-like but uniformly matt, with a microscopic scratch pattern oriented along the grain.
The final stage of sanding is the total removal of dust. Sanding dust, especially fine dust, can mix with the primer and create unevenness. We use powerful industrial vacuum cleaners, compressed air and, most importantly, tack cloths (tack-cloth). These special cloths ensure the removal of even the most microscopic dust particles, providing an absolutely clean surface ready for the application of the first coat.
💨 Dust Removal: Absolute Cleanliness Before Applying the Coating
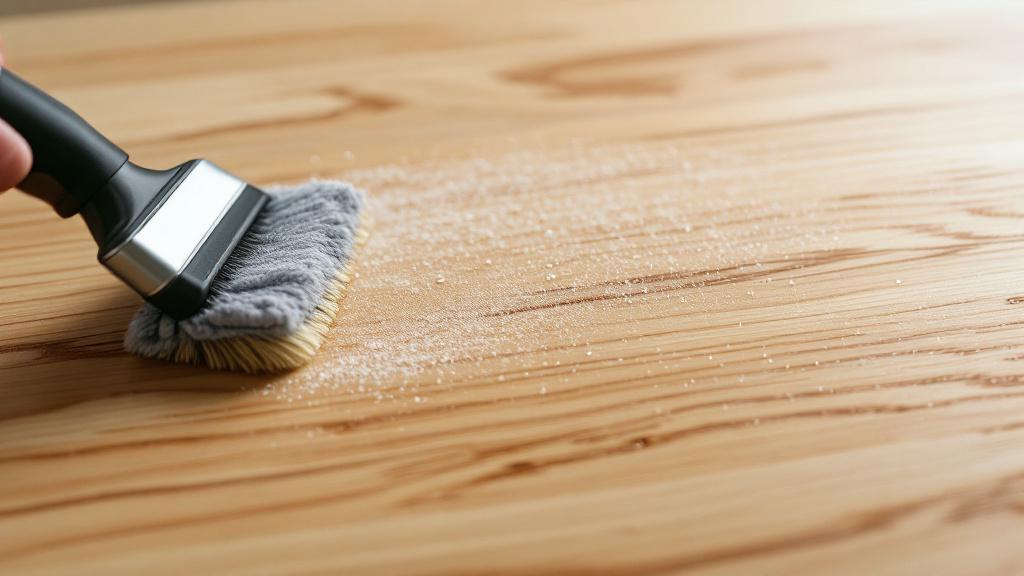
The dust-removal stage is a direct logical continuation of the sanding process, yet in terms of its criticality it deserves separate and the closest attention. A part can be sanded perfectly, but if even microscopic dust remains on it, the quality of the finish coat will be compromised. Remaining dust not only creates visual defects (“debris” in the varnish) but is also a serious barrier to the chemical bond between the wood and the coating material.
Dust generated during the sanding of wood, especially fine dust, has the ability to penetrate into all the pores and tiniest irregularities of the surface. If it is not removed, it mixes with the first coat of primer or varnish, forming lumps that, once dry, create roughness and, in the case of a gloss coating, visible inclusions that destroy the mirror effect. This defect, as a rule, cannot be corrected without re-sanding the entire surface.
The dust-removal process must be multi-stage. We do not rely on a single method but use them in a strict sequence to guarantee perfect cleanliness.
Step one: Mechanical removal (vacuum cleaner). Immediately after sanding, an industrial vacuum cleaner with a soft brush nozzle is used. The vacuum removes the bulk of the coarse and medium particles. It is important that this is a vacuum equipped with a HEPA filter, capable of capturing even the tiniest particles rather than simply driving them around the workshop.
Step two: Blowing with compressed air. For parts with a complex profile, carved elements, grooves or holes where the vacuum cannot cope, compressed air is used. The pressure must be controlled so as not to damage the wood fibres. Blowing is always done from the centre outwards, and the part itself must be in an extraction chamber or a zone with powerful ventilation to prevent already-raised dust from settling back.
Step three: Damp wiping or the use of alcohol (for certain coating materials). In some cases, especially when working with water-based systems or oils, we may apply wiping with a slightly damp, clean cloth. However, this requires an immediate transition to dry wiping to avoid raising the grain. A safer and more universal method is the use of technical isopropyl alcohol (IPA) or special degreasing compounds that evaporate quickly, leaving no traces and not affecting the stability of the wood.
Step four: Tack cloths (tack-cloth). This is the most important, final touch of dust removal. Tack cloths are a specialised material, lightly impregnated with resin or wax, designed to capture the finest dust particles, invisible to the eye, that remain after all the previous stages. Wiping must be light, without heavy pressure, so as not to transfer the cloth’s binding agent onto the wood surface, which could affect the adhesion of the coating.
- Workplace organisation: Dust removal must be carried out immediately before moving the part into the spray booth. Not too much time should pass between the final cleaning and the application of the primer, in order to avoid the settling of new dust from the workshop air.
- Workwear: Operators engaged in dust removal and painting must wear clean, lint-free clothing or disposable overalls. This eliminates the transfer of lint and dust from clothing onto the prepared surface.
- Cleanliness control: After the use of tack cloths, a final visual inspection is carried out under bright, raking light, which helps to reveal even minimal dust residues and defects.
Thorough dust removal is the guarantee that the coating material will be applied to clean, chemically active wood. This maximises adhesion, ensures smoothness and, as a result, multiplies the service life of the finish coat. At this stage there is no room for haste or compromise.
🌡️ Degreasing and Silicone Removal: Eliminating Barriers
Once the surface has been perfectly sanded and dust-free, the chemical preparation stage begins, which includes degreasing and, especially important in a workshop production setting, the removal of potential traces of silicone. This stage is often underestimated, but it is critically important for ensuring chemical adhesion.
Even wood that looks perfectly clean may have invisible films on its surface. These films can be caused by various factors:
- Natural oils and resins: Some wood species (for example, teak, iroko, cedar) contain a large amount of natural oils that can impede the penetration and polymerisation of the coating material.
- Fingerprints: Fingerprints, especially in areas of manual processing or handling, leave greasy marks.
- Cleaning-agent residues: Traces of paraffins or waxes used for the finishing polish of abrasive materials or tools.
- Silicone: This is the most dangerous contaminant. Silicone components contained in some polishes, lubricants or even in the workshop air can create an invisible water-repellent film.
Silicone and oils are the worst enemies of adhesion. When they get onto the surface, they create a barrier on which the varnish or paint is literally “repelled” or “wetted” unevenly. This manifests itself in the form of the so-called “fish eyes” — small round craters where the coating material could not hold onto the surface. Eliminating this defect once it has appeared is extremely difficult, often requiring a complete re-sanding.
For degreasing and removing these barriers we use specialised solvents. The choice of solvent depends on the type of coating material that will be used:
- For water-based systems: Mild, fast-evaporating cleaners based on isopropyl alcohol (IPA) or demineralised water with the addition of special degreasers are usually used. It is important not to over-wet the wood.
- For polyurethane and acrylic systems: Stronger but specialised cleaners are used, often referred to as “anti-silicone” agents or “degreasers for painting”. They are designed to dissolve oils, waxes and, above all, silicone, without damaging the structure of the wood.
- For oily species: In these cases a more aggressive degreasing with acetone or nitro solvents may be required, but with mandatory monitoring so as not to cause too strong a washing-out of the natural oils.
The degreasing process is carried out using clean, lint-free cloths. It is important to use the “two-cloth” technique:
- The first cloth: Is soaked in solvent and actively wipes the surface, dissolving the contaminants.
- The second cloth: Dry and clean, follows immediately behind the first to remove (lift off) rather than simply smear the dissolved contaminants. The solvent must evaporate from the surface without leaving a trace.
An important aspect is special silicone control. Silicone aerosols, lubricants or sealants may be used in neighbouring workshops. For this reason, all parts moving into the painting zone undergo mandatory anti-silicone treatment. This is a preventive measure that ensures external factors do not affect the critical adhesion stage.
Thorough degreasing guarantees that there will be no “foreign” layer between the wood and the primer. It ensures direct contact and the chemical reaction needed for the maximum strength and durability of the entire coating. Without this stage, all previous efforts on moisture control and sanding may prove to be in vain.
🛡️ Priming: Creating an Adhesion Bridge and Insulation
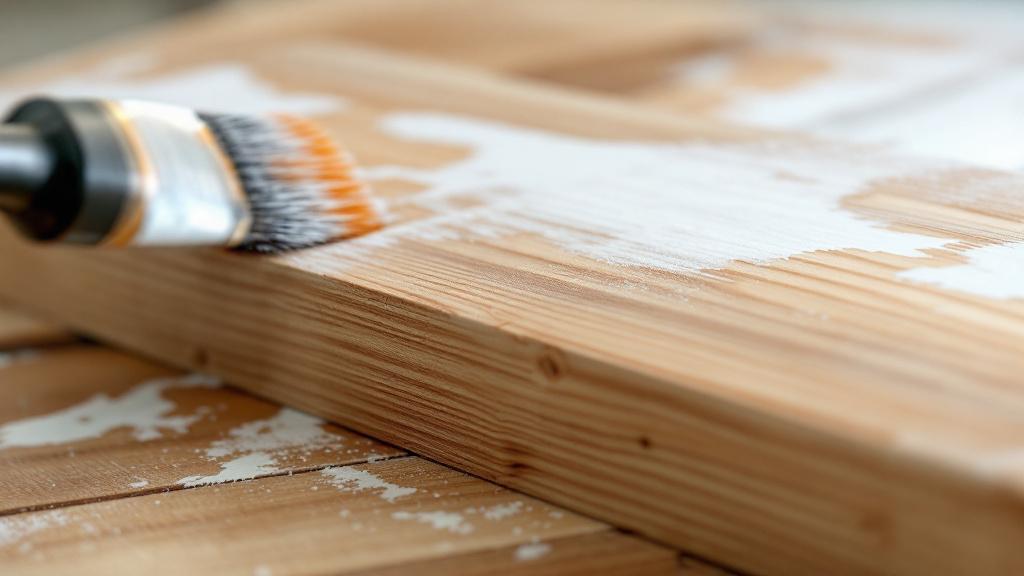
Priming is not just the application of a first coat; it is the technologically necessary process of creating an adhesion bridge between the wood and the finish coating, as well as performing the critically important function of insulation. Professional priming is an investment in quality that cannot be skipped, especially when it comes to the durability of the product.
Primer performs several key tasks, each aimed at improving the final result:
1. Increasing adhesion:
Primers are formulated with higher penetrating power and a special chemical composition that allows them to penetrate deep into the pores of the wood and bond with it. This creates a strong, chemically active layer to which the finish paint or varnish adheres significantly better than to bare wood. This is critically important for preventing the peeling and cracking of the coating.
2. Insulation and tannin blocking:
Many wood species, especially oak, ash, mahogany or pine (rich in resins), are characterised by the release of natural extractives (tannins, resins). When light or white coatings are used, these substances can “migrate” through the finish coat, causing yellow or brown stains to appear over time. Specialised insulating primers (blocking primers) completely seal the surface, locking these extractives inside the wood.
3. Evening out absorbency:
Wood is a material of uneven density. Areas with soft annual rings and the end grain absorb the coating far more readily than dense areas. If the finish coat is applied straight away, it will look blotchy. Primer, especially applied in several coats, evens out the absorbency across the entire surface, ensuring uniform colour, gloss and consumption of the finish paint.
4. Filling small pores and scratches:
A quality primer, often containing fine fillers, fills the microscopic pores of the wood and the fine scratch pattern from the final sanding. This is especially important for achieving a perfectly smooth, gloss or semi-gloss coating. The filler in the primer creates an even base, minimising the need to apply thick coats of expensive finish coating.
5. Saving finish material:
Since the primer takes on the role of a levelling and filling coat, the consumption of expensive finish paint or varnish is significantly reduced. The primer serves as a “consumable” material for filling, while the finish coating is responsible solely for colour and protection.
Technological requirements for priming:
- Compatibility: The primer must be chemically compatible both with the wood and with the finish coating (for example, a polyurethane primer under a polyurethane enamel). Using incompatible materials can lead to cracking or peeling.
- Adherence to consumption rates: Too thick a coat of primer can lead to it cracking during shrinkage, while too thin a coat will not perform its functions. Application must be even and in accordance with the manufacturer’s recommendations.
- Intermediate sanding (sanding the primer): After the primer has fully dried, a mandatory intermediate sanding is always carried out. It removes the raised grain and any minor irregularities created by application. A very fine grit is used (P240 – P320), and after sanding the surface is again thoroughly dust-removed.
The priming process is a technological shield that protects the future product from the natural shortcomings of wood and from external influences, ensuring the maximum durability and aesthetics of the finish.
⏳ Drying and Intercoat Waiting Time: Chemical Stabilisation
The process of drying and adhering to the intercoat waiting time is a stage that often tempts one to save time, yet it is precisely one of the key factors in the durability and strength of the entire coating system. Drying is not merely the evaporation of solvent; it is a complex chemical process of polymerisation, or curing, which must proceed fully and under controlled conditions.
1. Controlled drying conditions:
To ensure the correct polymerisation of the coating material, three parameters are critically important: temperature, air humidity and ventilation.
- Temperature: The optimal drying temperature is usually from +20°C to +25°C. Too low a temperature slows the curing process, while too high a temperature can cause the solvents to “boil” or a surface film to form that prevents the solvent from escaping from the inner layers, leading to cracking.
- Humidity: High air humidity, especially when using water-thinnable systems, slows evaporation. For solvent-based systems, high humidity can cause “clouding” or loss of gloss. The optimal relative humidity is — 40%–60%.
- Ventilation: A constant but not overly aggressive air circulation is needed to remove the evaporating solvents. This prevents the air from becoming saturated with vapours, which also slows drying.
2. Observing the intercoat waiting time:
Every coating-material manufacturer specifies a strict time that must elapse between the application of successive coats (primer — next coat of primer; primer — finish coat). This time is called the intercoat waiting time and serves to allow:
- “Dust-free” state (dust-free): The moment when the surface becomes dry enough that dust no longer sticks to it.
- Full evaporation of solvents: The bulk of the solvents must evaporate to avoid their interaction with the solvents of the next coat.
- Initial polymerisation: Creating a sufficiently strong yet still “open” surface for a chemical bond with the subsequent coat.
Breaching the intercoat waiting time is a serious technological error. If the next coat is applied too early (onto a “wet” previous one), its solvents will penetrate the lower layer and soften it, leading to a disruption of the structure, loss of gloss and, most importantly, a significant reduction in the overall strength of the system. The coating may remain “soft” for a long time.
3. Full curing (hard cure):
This is the time required for the coating material to reach its maximum chemical strength, hardness and resistance to mechanical and chemical influences. The full curing time is always significantly longer than the “touch-dry” time and can range from several days to several weeks. Shipping a product before full curing can lead to damage during packaging or transport (packaging material sticking, dents appearing). We inform customers of the need for careful handling during this period.
4. Moisture control within the layers:
For multi-coat systems, especially those using thick-layer or gel-like primers, it is necessary to make sure that the inner layers have no “trapped” solvent. We use specialised instruments for the non-destructive testing of the thickness and strength of the coating. The layer must be hard, not elastic.
Drying control is not only about following the instructions but also about the constant monitoring of the coating’s actual condition. Only the full and correct curing of each layer guarantees that the entire coating system will function as a single, strong and durable shield.
🩹 Filling: Levelling and Surface Repair
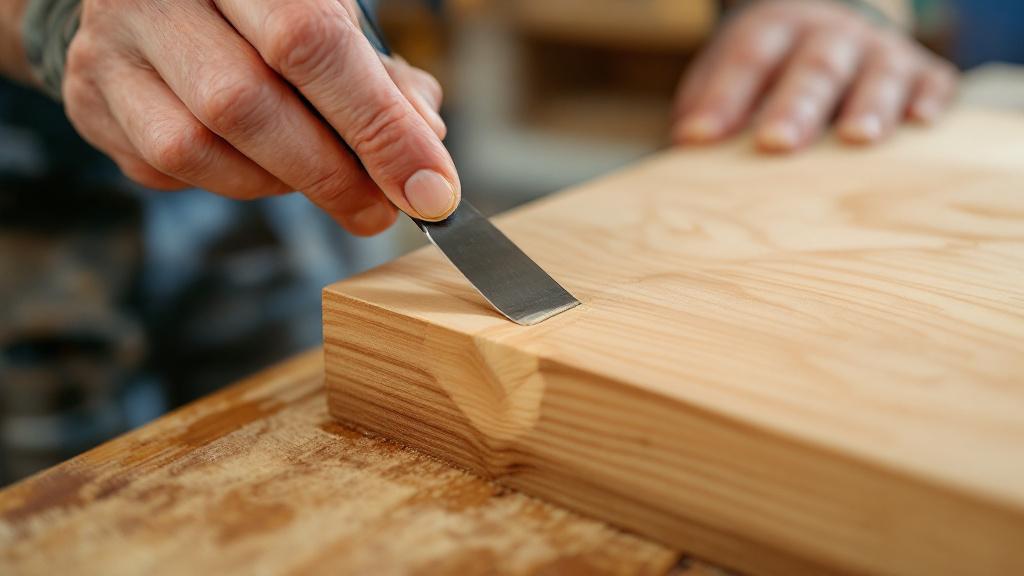
Filling, as a separate preparation stage, is a tool for the final levelling and elimination of local defects that were not, or could not be, removed at the initial repair and sanding stage. Filling is the art of concealment and of creating a flawless surface, especially important for a subsequent opaque paint job (enamel).
1. Choosing filler by purpose:
The choice of material is determined by the final type of finish:
- For opaque painting (enamel): Two-component polyester or acrylic fillers are used. They have high strength, do not shrink, dry quickly and are excellent to work with. Their main purpose is to create a perfectly even surface, concealing the wood texture, joints, fastener holes and minor chips.
- For a clear finish (varnish, stain): Specialised wood fillers are used, the colour of which is matched as closely as possible to the tone of the specific species. The main requirement is that after drying and sanding the repair spot should be as inconspicuous as possible. Mixtures of dust from the same species and a binder are often used.
2. Application technique:
Filler must be applied only to a clean, degreased surface. When working with two-component compounds, the mixing proportions of the components (base and hardener) must be strictly observed.
- Minimal layer: Filler is applied in as thin a layer as possible, only on the defect spot. Applying a thick layer “in one pass” will inevitably lead to shrinkage, cracking and poor adhesion. If a thick layer is required, it is better to apply it in several thin layers with intermediate drying.
- Orientation: Filler is applied with a spatula under pressure to ensure its maximum penetration and the filling of pores or cracks.
3. Eliminating shrinkage:
Even the highest-quality filler shrinks minimally. If filler is applied to damp wood, the shrinkage will be critical. This once again underlines the importance of moisture control. After full drying and initial sanding, a repeat, thin filling is sometimes required to eliminate the microscopic depressions that appeared after the first shrinkage.
4. Sanding the filler:
This stage requires care. Filler is significantly harder than wood, so during sanding there is a risk of removing too much of the surrounding wood, leaving a “bump” of filler.
- Grit: Sanding begins with a coarser grit (for example, P120) to remove the bulk, and then moves to a finish grit (P180–P220) to smooth the transition between the filler and the wood.
- Tool: Using a sanding block or a bar with a rigid base helps to control the evenness of sanding and prevents “depressions”.
5. Filling the end grain:
For end-grain cuts, which absorb moisture and coating material most readily, we often use filler or a special sealing primer (end sealer). This creates a barrier to moisture, reduces absorbency and prevents the formation of cracks on the end grain, which is critically important for exterior products.
Filling done to a high standard is not an attempt to conceal serious defects (which must be eliminated by replacement) but a precise and local tool for achieving the perfectly even surface that is a prerequisite for a premium-class finish.
💧 End-Grain Sealing: Protection Against Moisture
The end-grain cuts of wood (end grain) are the most vulnerable spot in any wooden product in terms of moisture absorption and, consequently, stability and durability. This is because the end grain exposes thousands of microscopic capillaries and vessels running along the fibres. Through these, the wood is able to absorb and release moisture many times faster than through the side surfaces.
Ignoring the end grain is one of the most frequent causes of cracking, deformation and premature failure of the coating, especially on elements used outdoors (for example, the ends of posts, beams, garden furniture).
The critical need for sealing:
- Moisture control: Sealing slows the rate at which the end grain absorbs and loses moisture. This is critically important, since it is precisely the uneven movement of moisture (the side surface already dry while the end grain is still damp) that causes internal stress leading to cracking at the ends of the part.
- Preventing rot and blue stain: Excessive moisture absorption through the end grain creates ideal conditions for the development of fungi and mould inside the wood, which ultimately destroys its structure even if the side surface is protected by paint.
- Evening out coating absorbency: If the end grain is not sealed, it will “drink up” a huge amount of primer or finish coating, leading to excess material consumption and, most importantly, to the formation of a dark, often unattractive stain that differs in colour and gloss from the main surface.
Professional methods of sealing the end grain:
- Specialised sealants (end-grain sealers): This is the most effective method. Thick-layer, elastic polyurethane or acrylic sealants with a high solids content are used. They are applied with a brush or spatula to create a thick, strong, impermeable film.
- Epoxy resins: For products with the highest requirements for durability and water resistance (for example, for marine or outdoor structures) we use clear or pigmented epoxy resins. The resin penetrates deep into the capillaries and polymerises, creating a completely impermeable and indestructible barrier.
- Multi-coat priming: If a specialised sealant is not used, the end grain is treated with additional coats of the main primer. For example, if one coat of primer is applied to the side surface, two or even three coats may be applied to the end grain with minimal intermediate sanding, in order to saturate and close the open pores as much as possible.
- Paraffin and wax (for certain systems): In some traditional systems, or when working with oil and wax, the end grain can be treated with hot paraffin or special end waxes. This method is less durable than synthetic sealants but provides the necessary protection when used in moderate conditions.
It is important to remember that sealing the end grain is carried out before the finish painting. After sealing, the end-grain surface is sanded to remove excess sealant and to create an even transition to the side surface, which ensures an aesthetic appearance.
Professional end-grain sealing is a simple but absolutely essential technological operation that makes a huge contribution to the overall moisture resistance and structural integrity of the product, guaranteeing durability for decades.
🎨 Final Preparation and Booth Cleanliness: The Conditions of Application
Once all the stages of mechanical and chemical preparation are complete — moisture has been monitored, defects eliminated, the surface sanded to P220–P240, degreased and primed with mandatory intermediate sanding and dust removal — the part moves on to the final stage: creating the ideal conditions for applying the finish coating. This stage concerns not the part itself but the surrounding environment, which plays a decisive role in achieving a flawless coating.
1. Preparing the spray booth:
The ideal spray booth is not just a room, it is a controlled environment that must meet the following requirements:
- Heating and temperature control: The temperature in the booth must be stable and meet the requirements of the coating-material manufacturer (usually 20–25 degrees Celsius). This is critical for the viscosity of the material and the speed of its polymerisation.
- Air filtration (supply and extraction): The booth must be equipped with a multi-level filtration system. The supply air must pass through high-grade filters (for example, F5–F7 class) to prevent the ingress of dust, lint and insects. The extraction system must ensure the effective removal of solvent vapours and paint mist.
- Positive pressure (over-pressurisation): In an ideal booth a slightly positive pressure is maintained. This means that the air always moves from the inside out, preventing contaminated air from entering from outside through gaps or when doors are opened.
2. Humidity control in the booth:
Air humidity must be maintained within the optimal range (40%–60%). Too high a humidity will slow drying and can cause defects. Professional hygrometers and, where necessary, dehumidifiers or humidifiers are used for control.
3. Organising the working space:
- Stands and holders: Parts must be placed on clean, specialised stands or rotating tables. The contact area must be minimal so as not to hinder even application and to prevent sticking.
- Excluding silicone: Inside and near the spray booth, the use of any products containing silicone, including tool lubricants or polishes, is absolutely forbidden.
4. Preparing the application equipment:
The painting equipment (spray guns, pumps, hoses) must be perfectly clean. Any residues of old paint or contaminants can be spat out onto the fresh coating. Before starting work, the spray gun is dismantled, flushed and checked for leaks.
5. Operator’s clothing:
The operator applying the coating must wear a specialised, lint-free, antistatic overall. Hair must be covered. This minimises the risk of transferring lint and dust from the body and clothing onto the prepared surface.
6. Final wipe with a tack cloth:
Immediately before the operator picks up the spray gun, the part undergoes a last, quick wipe with a tack cloth. This captures dust that may have settled on the surface during the move from the preparation area to the booth. This step takes seconds but provides the maximum guarantee of cleanliness.
Observing all these conditions creates the ideal micro-environment for applying the coating. Ultimately, the quality of the finish coat is a reflection of the attention to detail at all previous stages and of flawless cleanliness at the moment of application. Only with such an approach can a durable and aesthetically perfect result be guaranteed.
✅ Testing and Control: Verifying the Quality of Preparation
Even with strict adherence to all the technological stages, a final quality check of the preparation is a mandatory condition of professional work. The check must be multi-stage in order to guarantee that the part is fully ready for the application of the finish coat.
1. Visual inspection at an angle:
The simplest but one of the most effective methods. The prepared part is inspected under bright, raking light (for example, a directed lamp). Such light instantly reveals:
- Sanding scratch pattern: Scratches left by cross-grain or overly coarse sanding, which may be invisible under normal lighting.
- Depressions and bumps: Irregularities formed by improper filling or sanding (for example, a depression in the centre of a filled area).
- Adhesive or resin residues: These areas will have a different texture and gloss.
2. Primer adhesion check (Cross-Cut Test):
After application and full drying of the primer, a non-destructive or semi-destructive adhesion test is carried out. For this, a specialised tool (an adhesion tester or simply a sharp knife) is used to perform the cross-cut test:
- A grid of 6–11 parallel cuts spaced 1–2 mm apart is made on the dried primer, cutting right down to the wood.
- The same grid is made perpendicular to the first.
- A standardised tape (adhesive tape) is stuck over the grid and sharply pulled off.
- Well-adhered primer should not peel off. This test gives an objective assessment of how well the primer has “bonded” with the wood.
3. Absorbency test (drop test):
After priming and intermediate sanding, the surface should have a uniform, low absorbency.
- A few drops of water or solvent are applied at different points.
- If the drop is absorbed quickly, this indicates that the primer was applied in too thin a layer or that there is an area of high porosity at that spot (for example, the end grain).
- If the drop stays put, this confirms that the surface is sealed and ready for the even application of the finish coat.
4. Measuring the layer thickness (for opaque systems):
A thickness gauge is used for the non-destructive measurement of the dry film thickness (DFT). This makes it possible to ensure that the primer coat has been applied evenly and has sufficient thickness to perform its insulating and filling function. Too thin a layer will not be effective; too thick a layer may crack.
5. pH assessment (for water-based systems):
When using water-based coatings, a surface acidity test is sometimes carried out. An extremely acidic or alkaline environment can negatively affect the polymerisation of water-based acrylic and polyurethane systems.
The final check is the last opportunity to correct a potential defect before applying the finish — the most expensive and labour-intensive coat. If the check reveals a problem (poor adhesion, a visible scratch pattern, unevenness), the part is returned for repeat sanding and priming.
📝 Documenting the Process: Guarantee and Responsibility
In professional woodworking, especially when carrying out large orders or producing premium-class items, documenting the paint-preparation process is an integral part of technological discipline. This is not bureaucracy but a quality-control system and the basis for providing a guarantee on the finish coating.
1. Production control log:
For each batch or major project, a log is kept in which the key parameters are recorded:
- Date and time of the start and end of each stage.
- Wood moisture content: The actual moisture-meter readings before the start of processing (as a % of mass).
- Materials used: The exact names and markings of abrasives, fillers, primer grades and solvents, including batch numbers.
- Conditions in the booth: The temperature and relative air humidity at the moment of priming and drying.
- Waiting time: The actual intercoat and full drying time.
2. Process route cards:
A detailed step-by-step set of instructions that was implemented is created. For example:
- Sanding: P120 (machine) -> P180 (machine) -> P240 (manual, with grain raising).
- Priming: Primer X-50, application 150 g/m², thickness 80 µm, drying 4 hours at 22 degrees Celsius.
- Intermediate sanding: P320.
3. Photo and video documentation:
For contentious or particularly complex assemblies (for example, the repair of large defects, glued joints) photo documentation is kept. This makes it possible to confirm that all repair work was carried out in accordance with the approved standard.
4. Confirmation of compatibility:
Documentary confirmation that all the chemical materials used (primer, enamel, solvent) belong to one chemical system or are officially approved by the manufacturers as compatible.
5. Adhesion test report:
The results of a sample cross-cut test are recorded, including a photograph of the result and an assessment on the accepted scale (for example, DIN EN ISO 2409).
6. Product quality passport:
The final document package for the customer includes a “Quality Passport”, which certifies that the surface preparation and application of the coating were carried out in full compliance with the company’s high standards. This not only confirms quality but also serves as the basis for warranty service.
Documenting the preparation process is a professional responsibility that ensures the repeatability of the result. If, a year later, the product requires repair or additional painting, the presence of precise documentation will make it possible to reproduce the original coating system without error. Ultimately, this builds trust with the customer and demonstrates the high technological level of the production.